


My shop is temporarily closed .
I invite you to take a few minutes to explore the blog.
Try a free pattern!
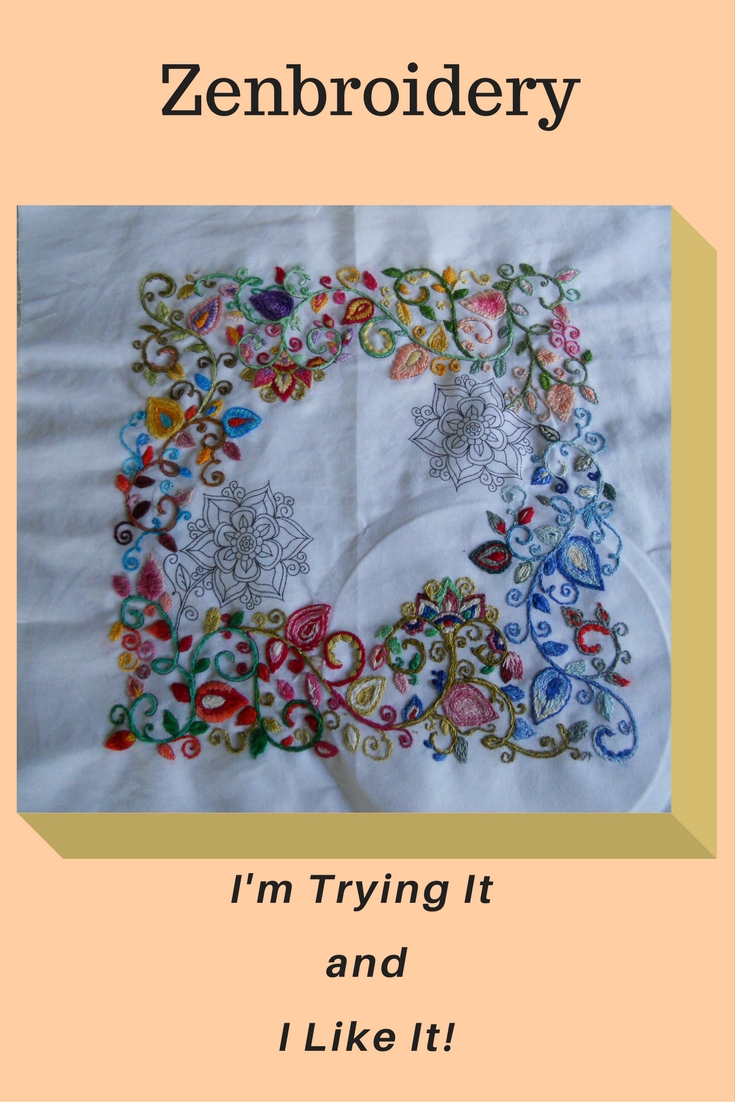
Have you tried Zenbroidery™ yet? Finding myself between cross stitch projects, I decided I would pull out a Zenbroidery™ kit that I purchased at a local craft store and give it a try. I have to say, I am enjoying it. Keep reading to get more details about my experiment with Zenbroidery™.
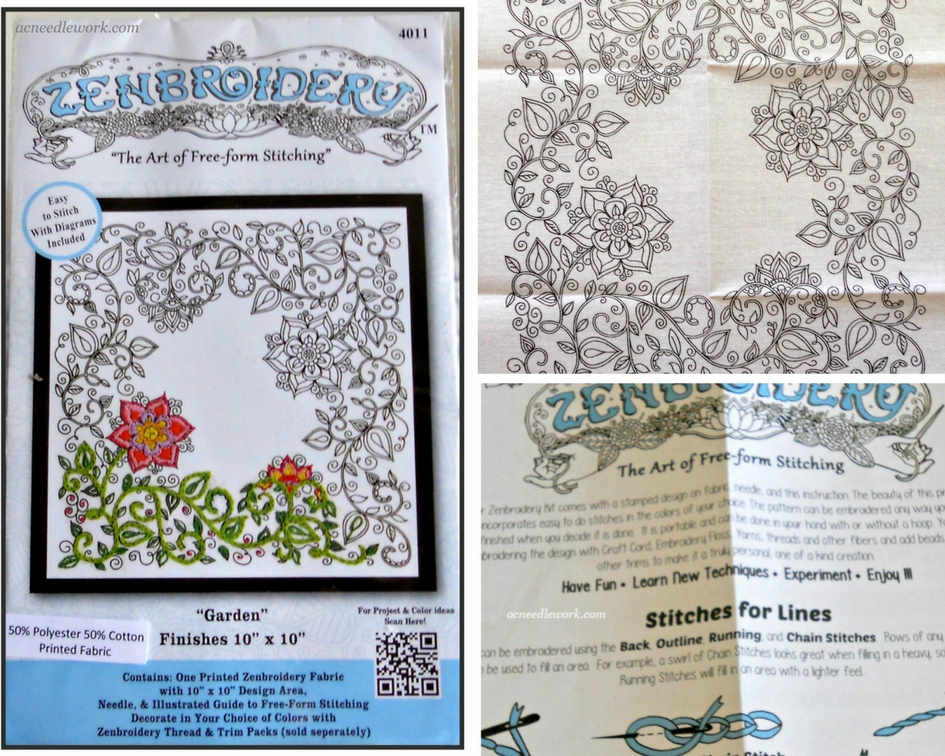
In an earlier blog post, I reviewed the Zenbroidery™ kit I stumbled upon the kit while shopping for other crafts one day. Since it was only five dollars, I bought it. (You can get all the details about the pattern in that earlier blog post.)
Note: I have not received any compensation for any products or teaching materials referred to in this blog post. I am sharing them because I found them useful.
Spending most of my time cross stitching, I probably hadn’t done traditional embroidery in 20 years. I havealso wanted to learn “thread painting” for a long time. I decided I would brush up on my old embroidery skills and try my hand at “thread painting”.
Thread painting or needle painting is the process of using long and short stitches to embroider a design. You use various shades of embroidery floss to create a shading effect to a surface embroidery design.
Where To Learn Needle Painting
There are many examples of needle painting on line and in books. Author, designer and teacher, Trish Burr is one well-known expert in needle painting. You can find her beautiful work, information and tutorials for needle painting on her website.
I turned to embroidery expert, Mary Corbett’s Needle and Thread website for her instructional series on thread painting. In nine thorough lessons, she demonstrates the basics of long and short stitch and then teaches you how to do leaves, flowers, circles and other shapes. She includes designs to trace and use for the lessons. The lessons are offered in videos and detailed step by step photos and instructions if you prefer to learn that way. I found her lessons easy to follow and they fit my learning style the best.
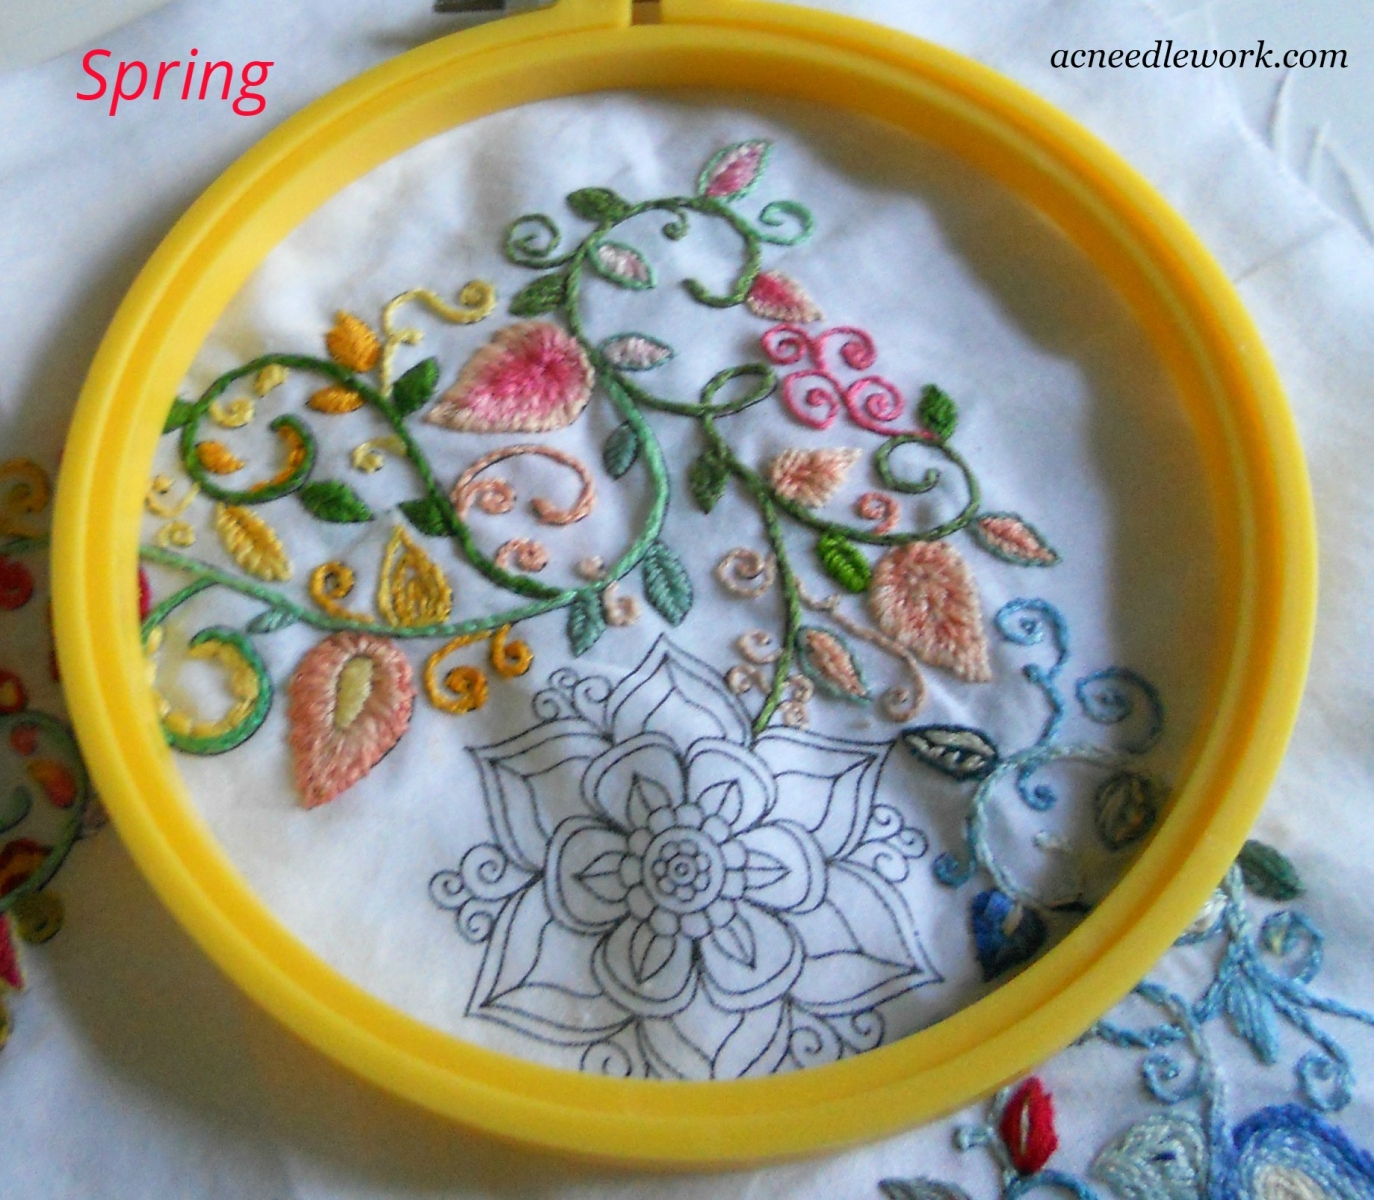
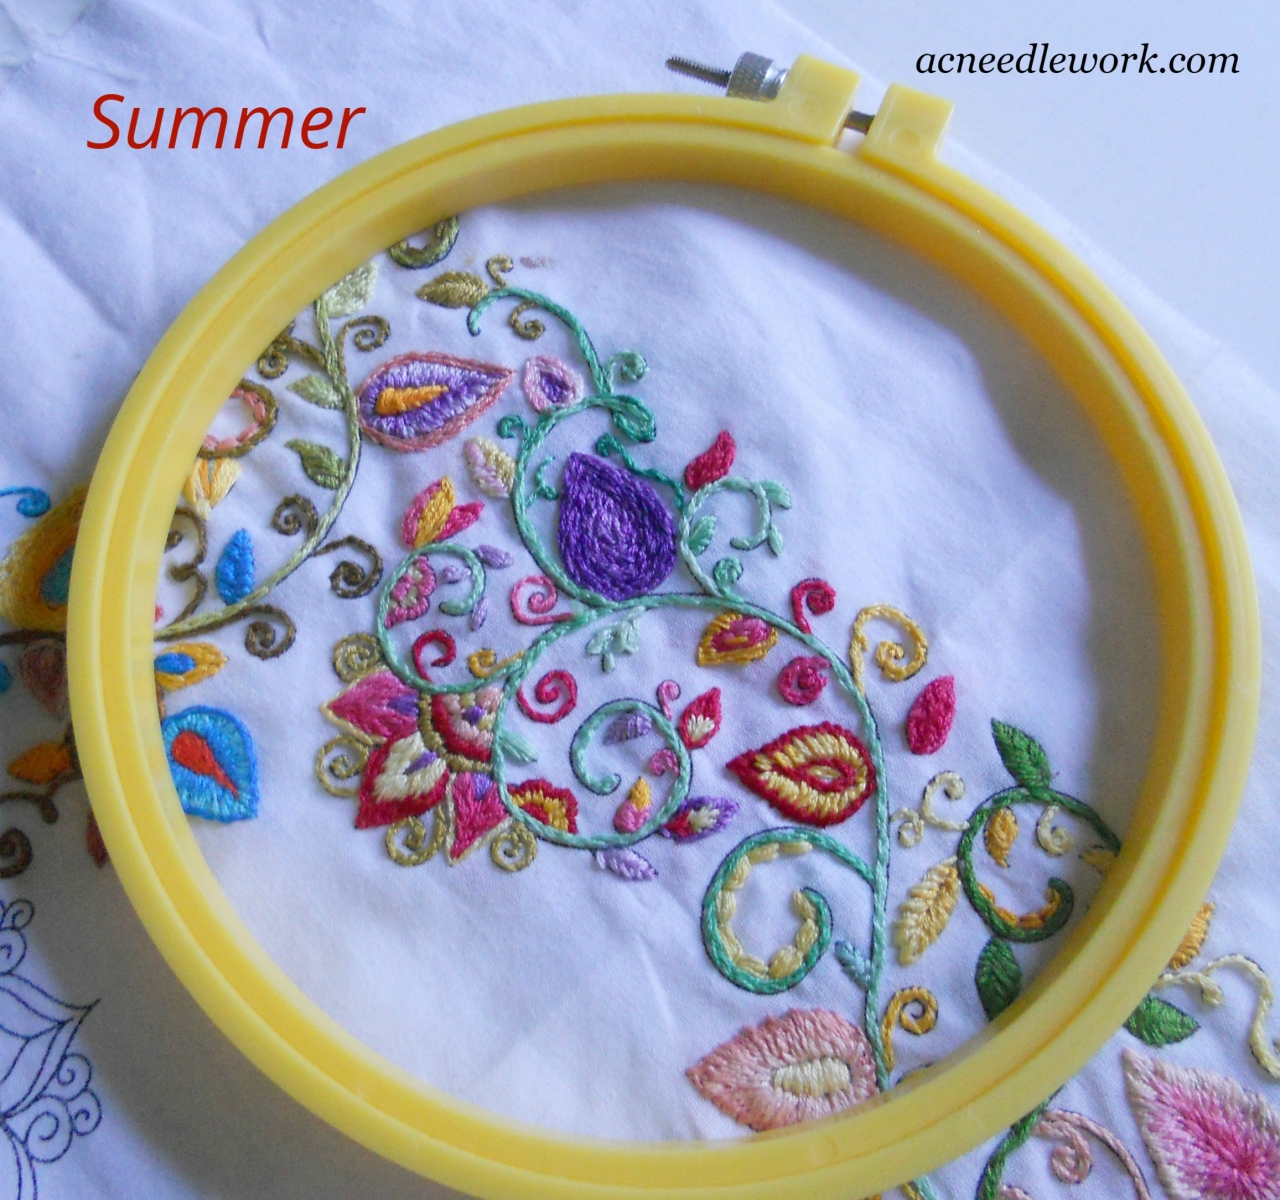
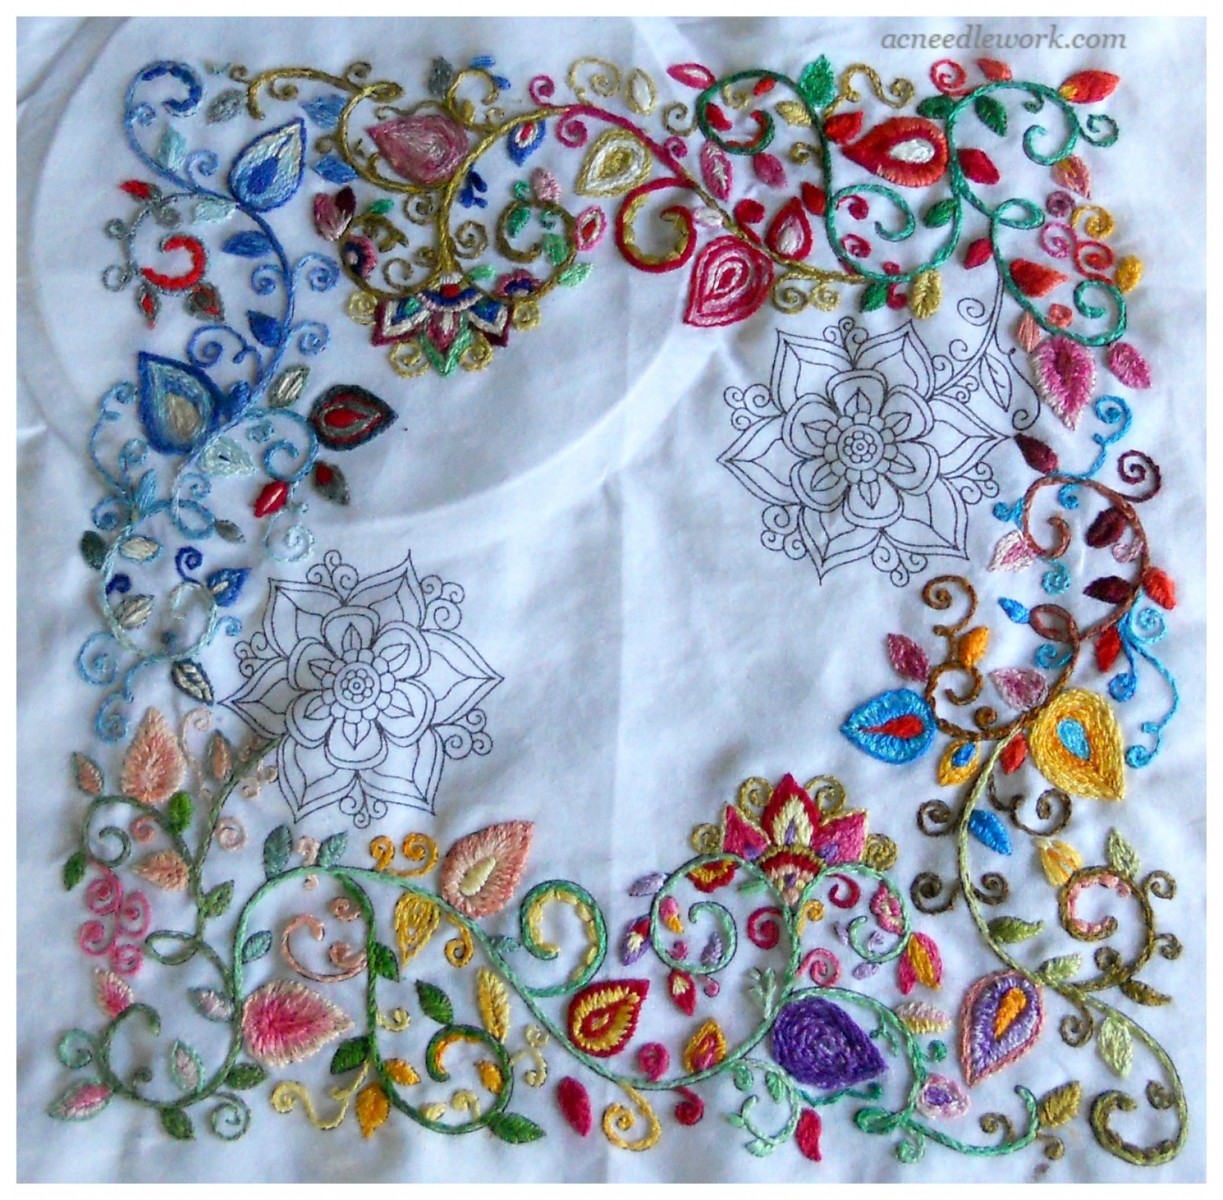
After practicing on some white muslin, I decided to put my old and newly learned skills to the test on the Zenbroidery™ kit. After pulling out my DMC floss stash, I decided to create a color way around the colors of the four seasons. I used the split stitch, satin stitch and the short and long stitch I learned in the needle painting lessons I described earlier.
The Zenbroidery™ kit includes the embroidery design stamped on white fabric, an instruction sheet for some basic embroidery stitches, and a chenille needle. You supply the embroidery floss and any other embellishments you want to include. I will say that I found the fabric in the kit to be a bit thin. It stitched up fine but you can see through it.
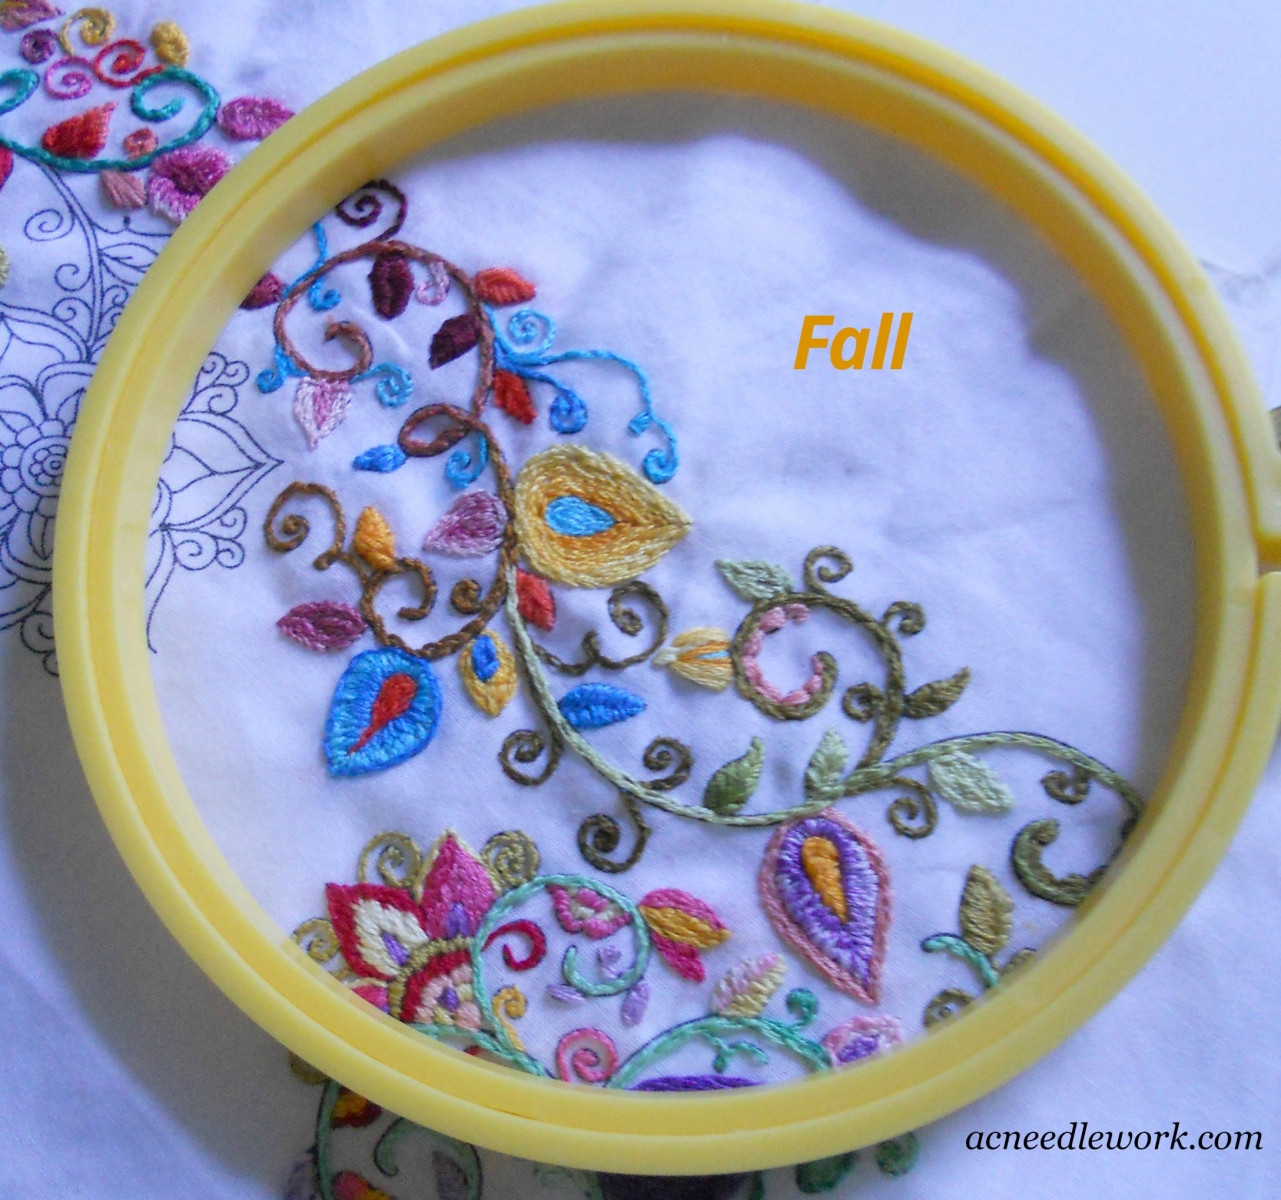
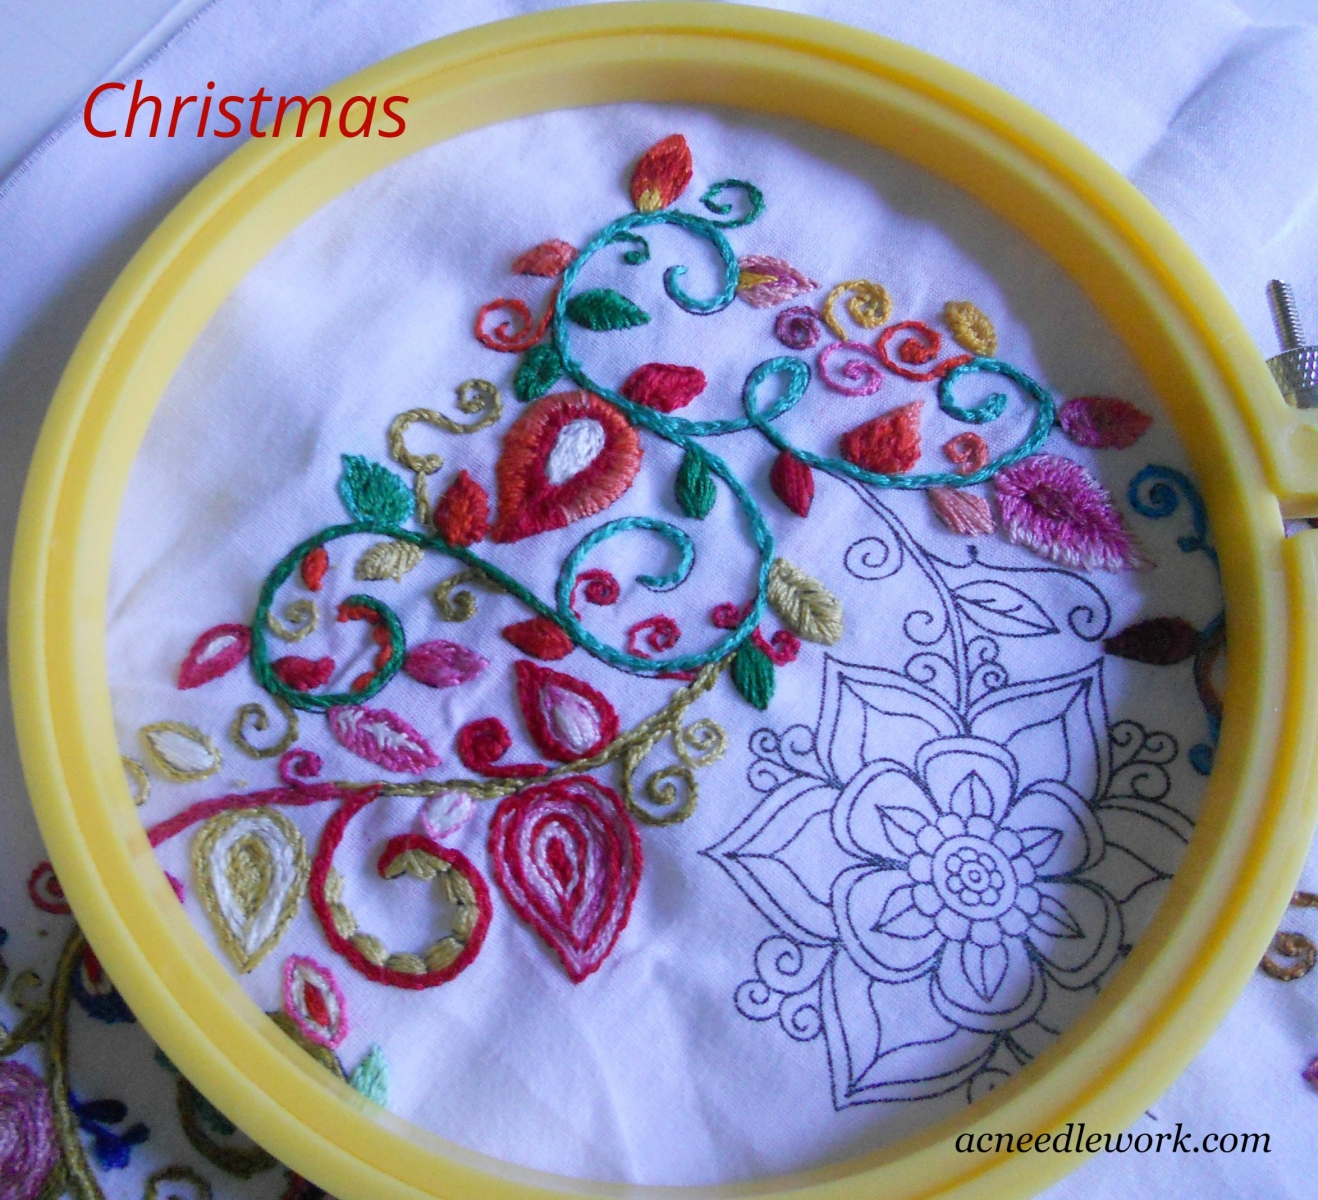
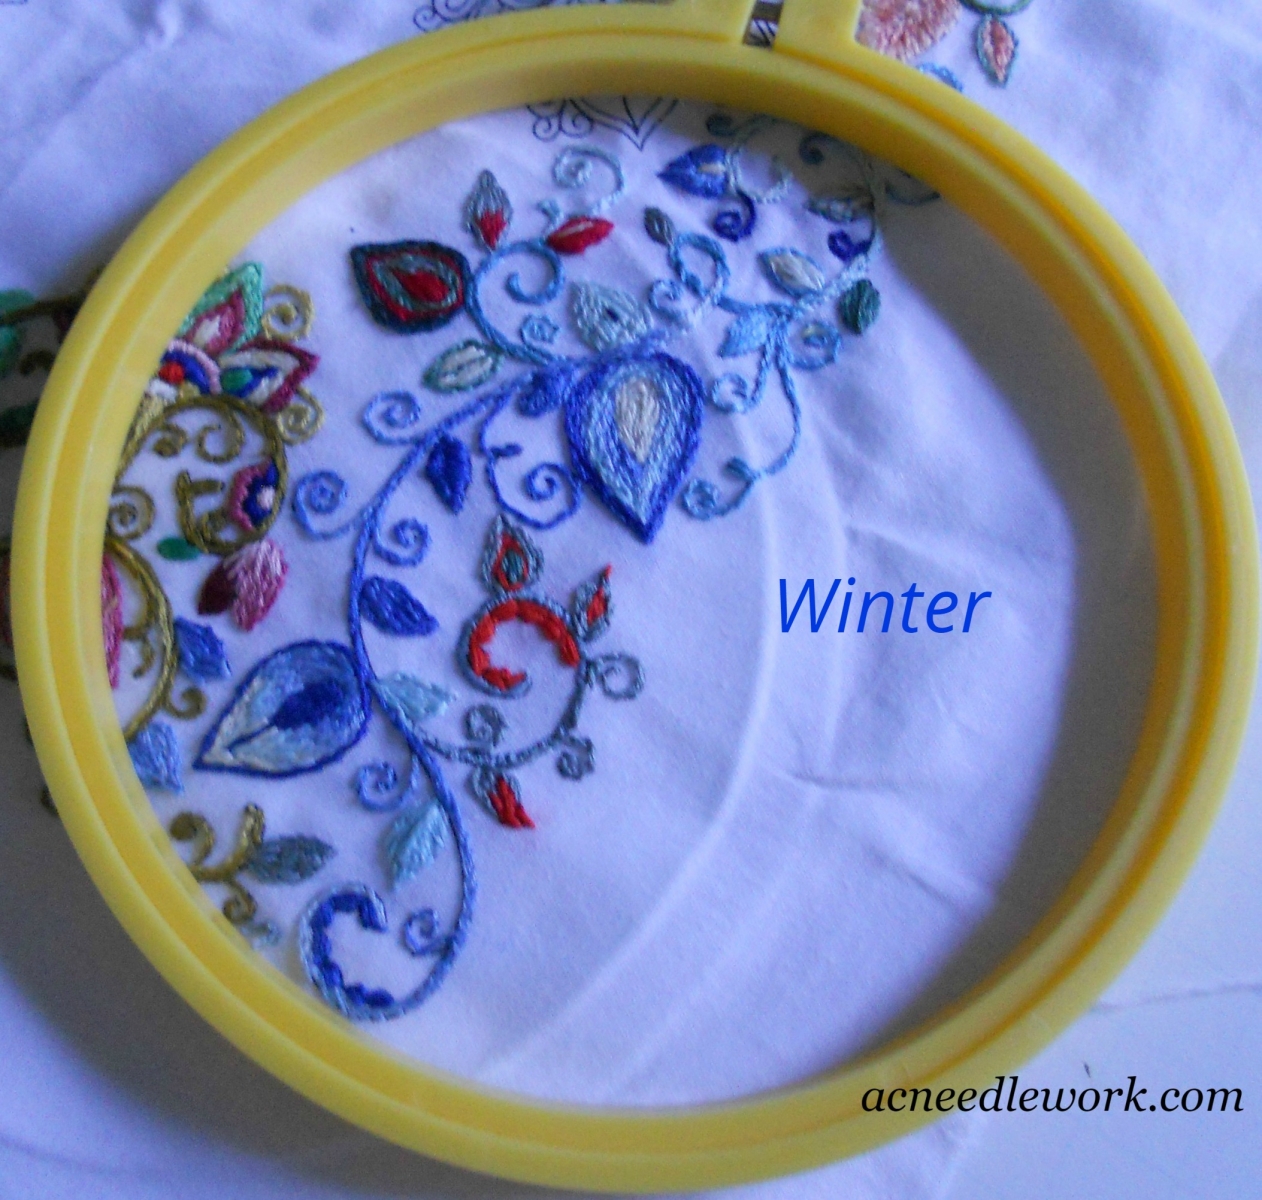
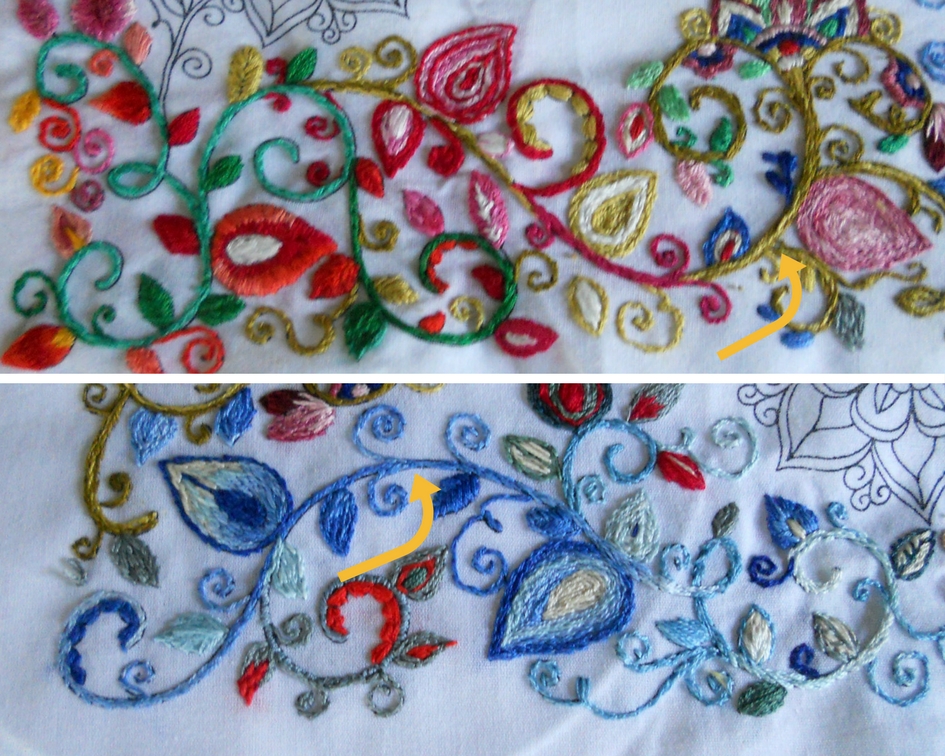
I chose floss colors from my stash to reflect colors of the four seasons and Christmas.
Here are photos of the project by colorways.
Now for the different stitches I used.
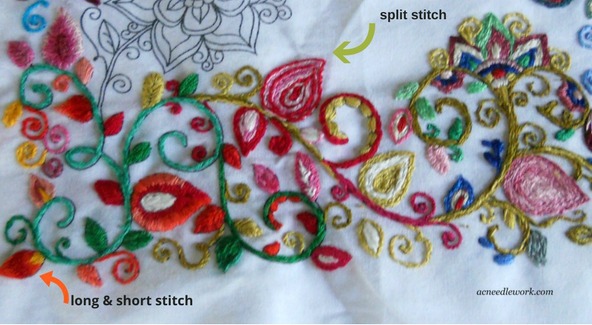
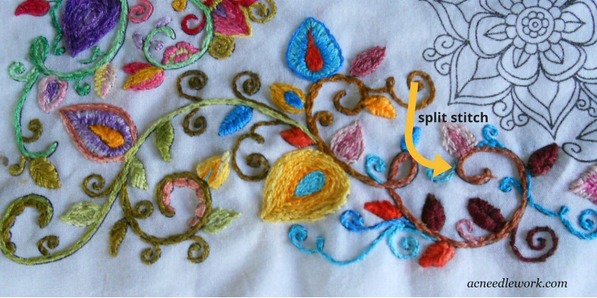
I used the long & short stitch in many places. I was especially pleased with the way the bud in the lower corner turned out. I think the split stitch was one of my favorite stitches. I used it in the stems and even the flowers.
Satin Stitch
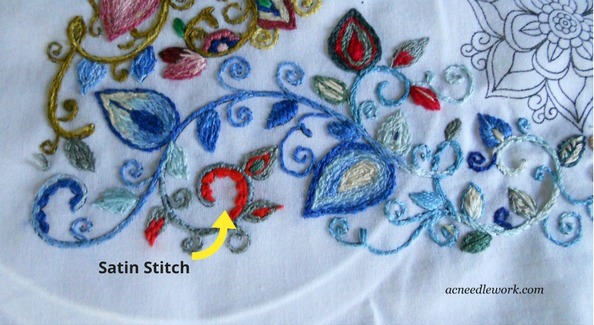
The traditional satin stitch worked well in these curves.
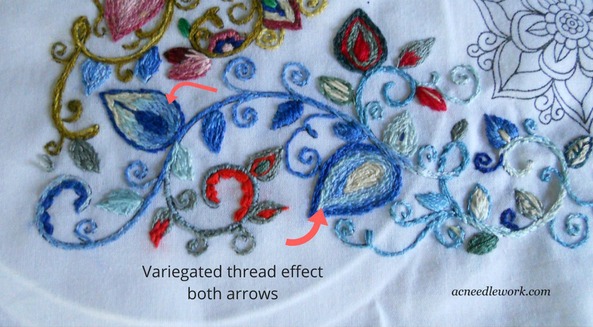
Variegated Floss
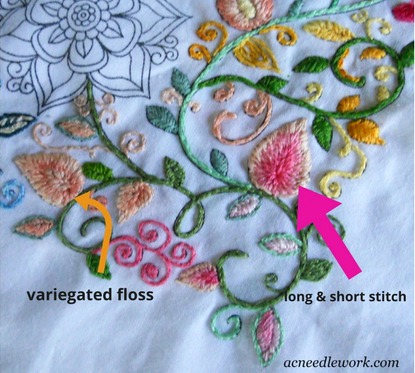
I used DMC variegated floss for much of the piece. I liked the shading effect I got with this floss.
Challenge!!!
Covering the lines was a challenge. The more I stitched, the better I got at covering them. I found that if inserted the needle outside the line, the floss covered it better.
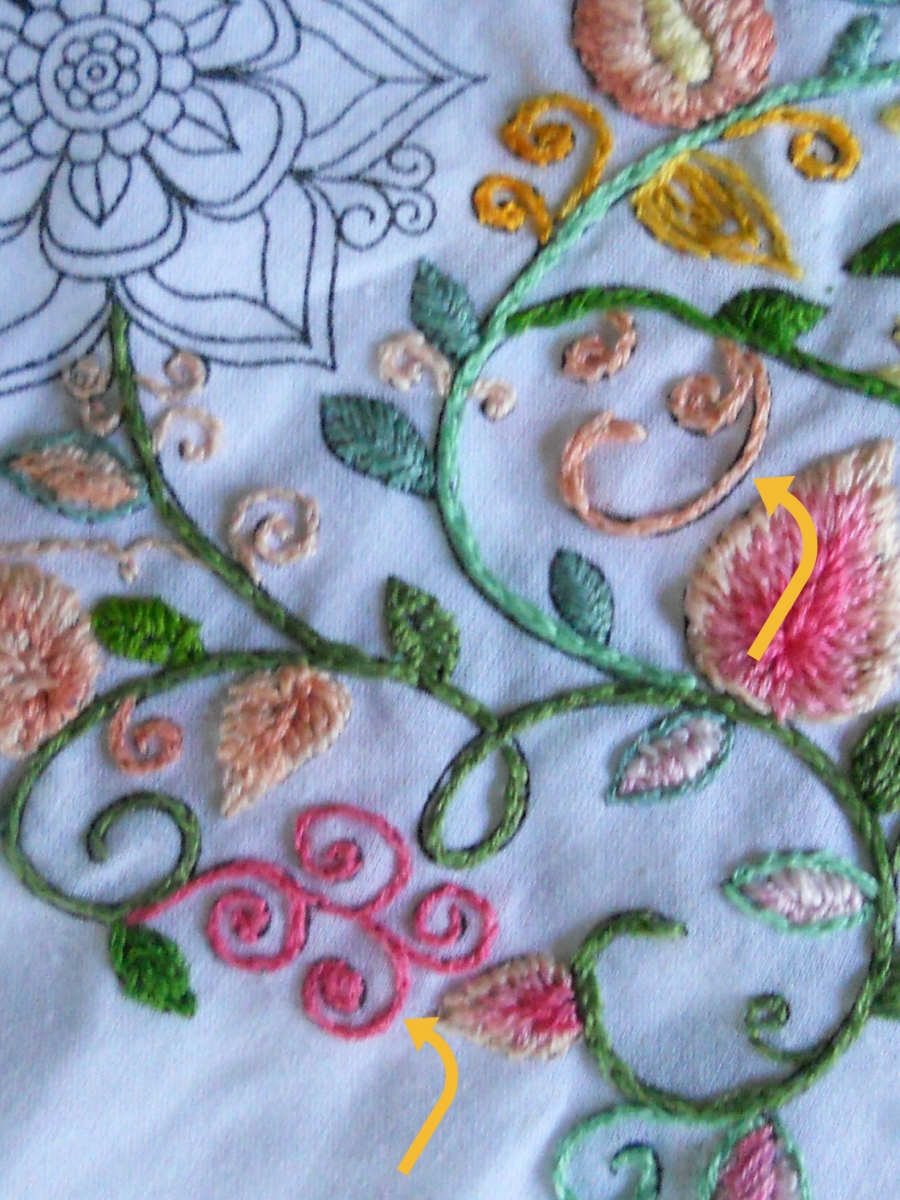
Lines not covered completely.
Improvement!
Overall, Zenbroidery™ was a fun project. I almost felt like I was coloring in a coloring book. Instead of choosing crayons, I was choosing floss. It offered an opportunity to refresh my skills in surface embroidery. Most of all, I got the hang of needle painting and really liked it. Of course I can use more practice to master that skill. If you are looking for a different needle project, this may be a good option.
(Note: I have not received any compensation for any products or teaching materials referred to in this blog post. I am sharing them because I found them useful.)
Resources:
Mary Corbet’s Needle and Thread
©Post updated for accuracy. First published - 2017 Anne Cole. All Rights Reserved.
Related Post:
Have You Tried Zenbroidery Yet?
.jpg)
Be a part of the AC Needlework Community by following us on
If you enjoyed this post, share it with others: