


My shop is temporarily closed .
I invite you to take a few minutes to explore the blog.
Try a free pattern!
.png)
Looking for ways to make your stitching a little easier? I know I am. That’s why I am always on the lookout for useful tips. In this blog post, I am going to share five practical tips that I use all of the time when I am cross stitching. They will save you time, keep you organized and solve some of the problems you may run into when stitching. Hope you will find at least one tip you can use.
(Note: I do not receive any monetary reward for any products featured in this post. I am including them because I like them and actually use them!!)
.jpg)
.jpg)
Does your stitching area look like this? Mine used to. Then I adopted a cat and a mess like this became a hazard for him. I needed something with a lid that I could put those little leftover threads in while I was actually stitching. My solution? Containers right from my kitchen. The one in the photo is a cute little crock that held some great French mustard my brother brought me from one of his trips to Paris.
.jpg)
Or upcycle a container like this one. A little bit of Duck Tape ™ and washi tape will turn a potato chip can into a decorative vessel for your snippets. You can get detailed instructions for this project in a previous blog post I published. With this tip, you too can have a workspace that is neat and tidy.

Update: In 2017, the makers of Thread Heaven retired and this product is no longer in production. See an update on floss conditioner in my post 5 Practical Tips Every Cross Stitch Needs To Know - An Update On Floss Conditioner.
Does your embroidery floss knot up when you are stitching? Do you forget to let it twirl from time to time to let it unwind? Do those two strands of floss split every time you try to thread a needle? Well, this product that I recently tried has helped with this problem.
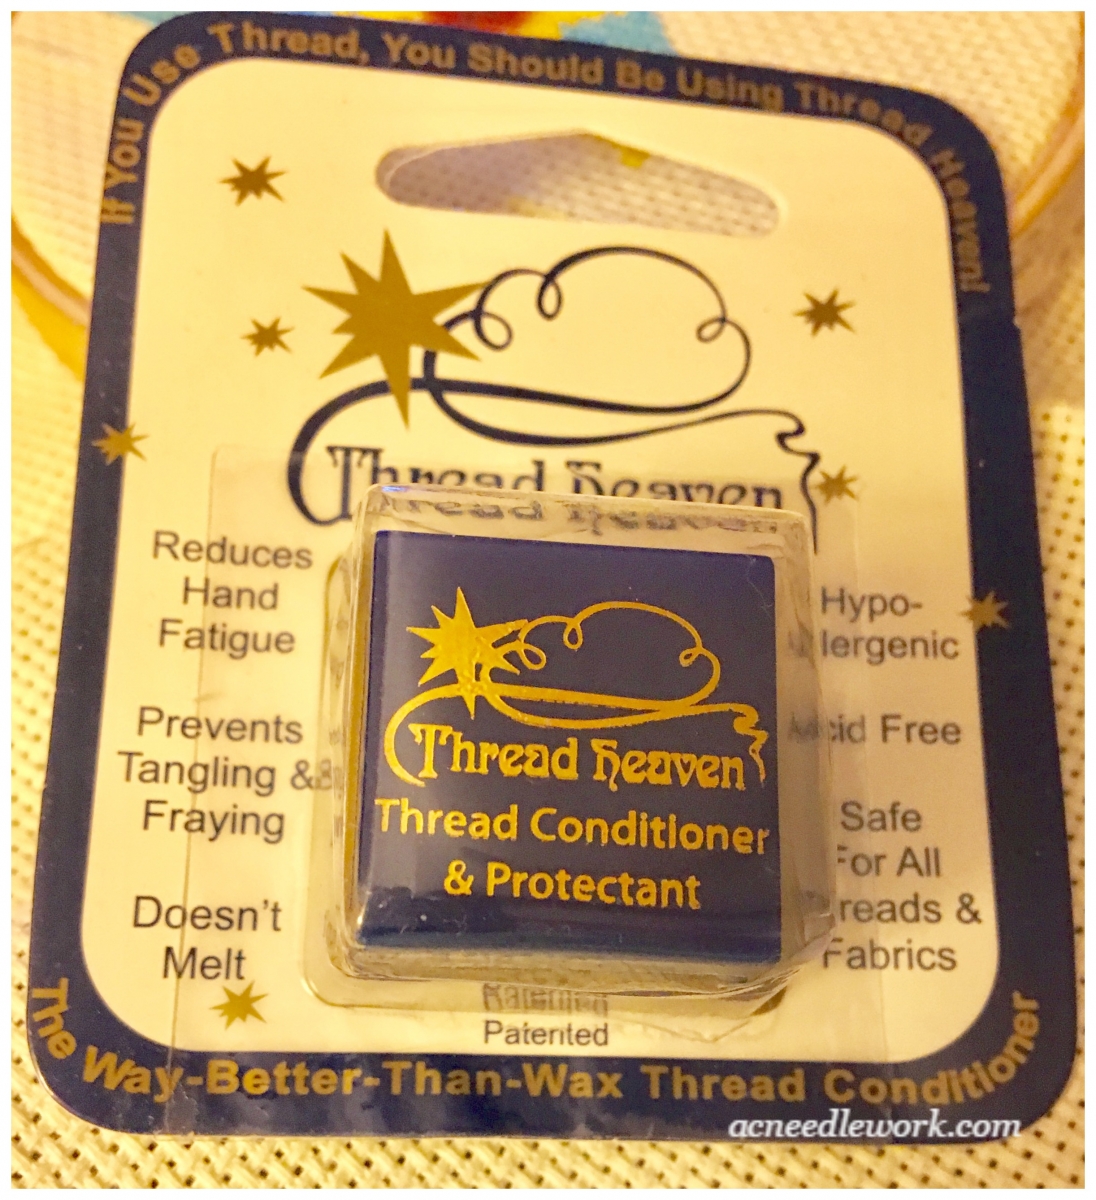
It is called Thread Heaven and is a thread protectant. When I first ran across it in a catalog, I was a little skeptical but since it was just a few dollars, I figured, why not give it a try.
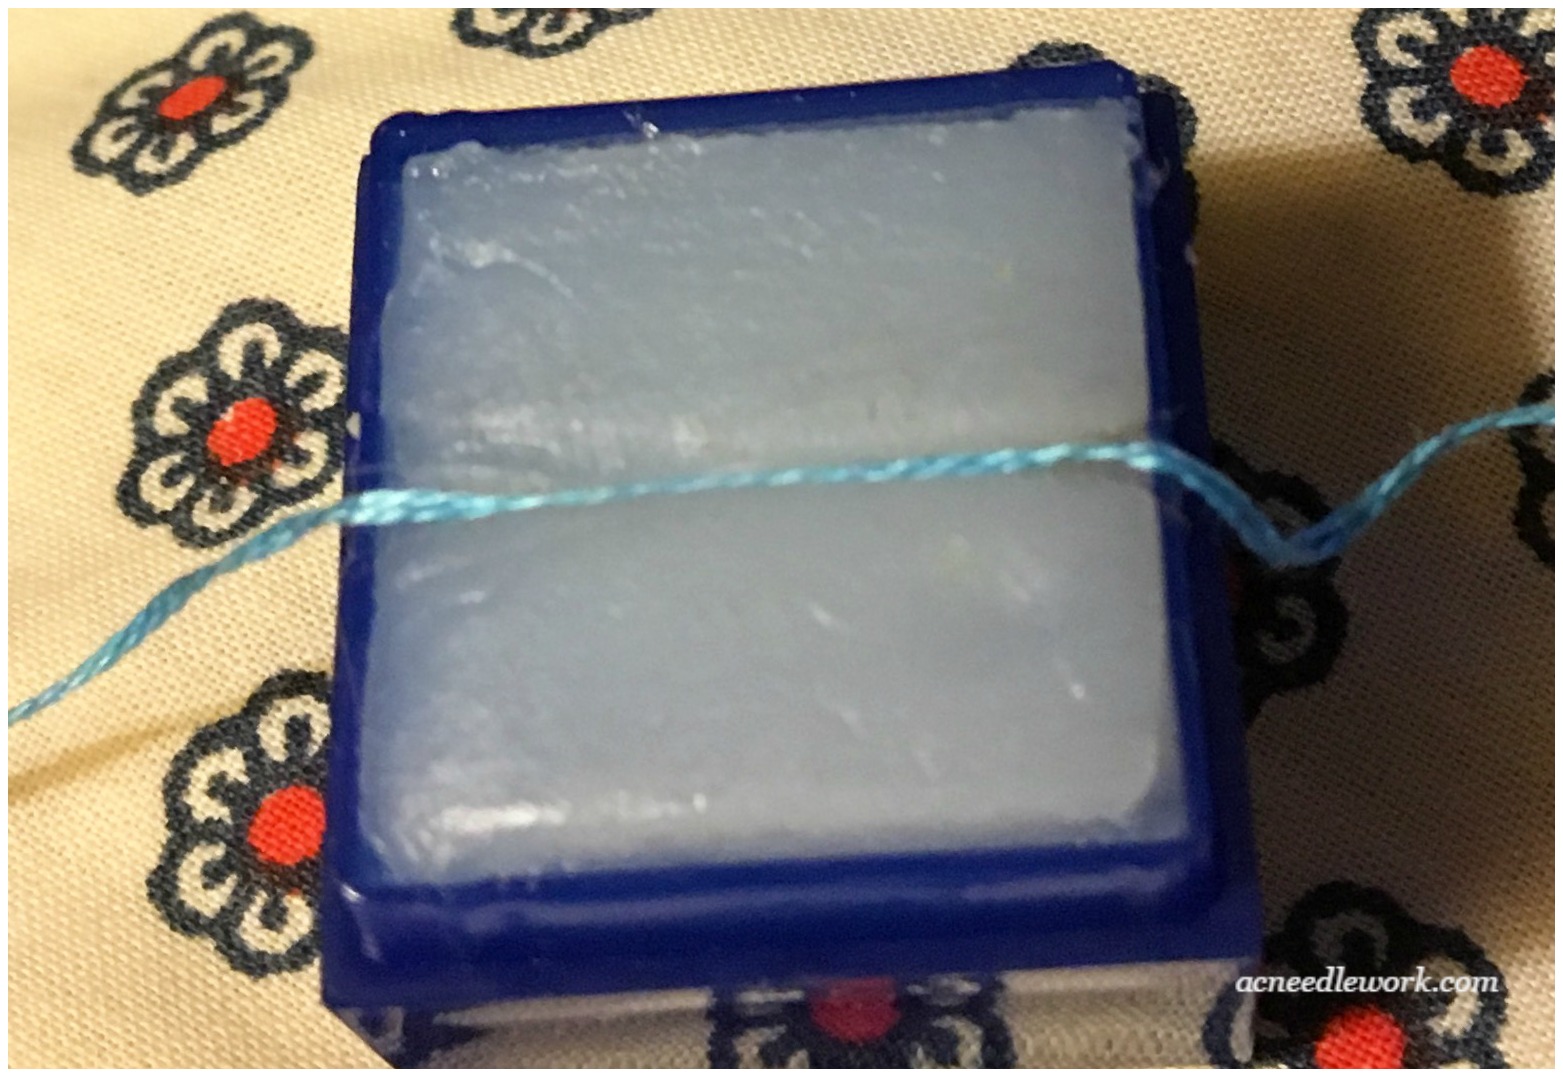
This is what it looks like. It feels a bit like wax but it has a rubbery texture to it. When I used it the first time, I made a little ditch across the middle with a needle, tucked the floss in the ditch and ran the floss across the substance. Hold your finger over the floss as you drag it through the ditch to get good coverage. It does not leave a residue in your fabric as you stitch. Instructions are on the back of the package. Their website will give you more details about the product. I do find that it makes the floss easier to work with.

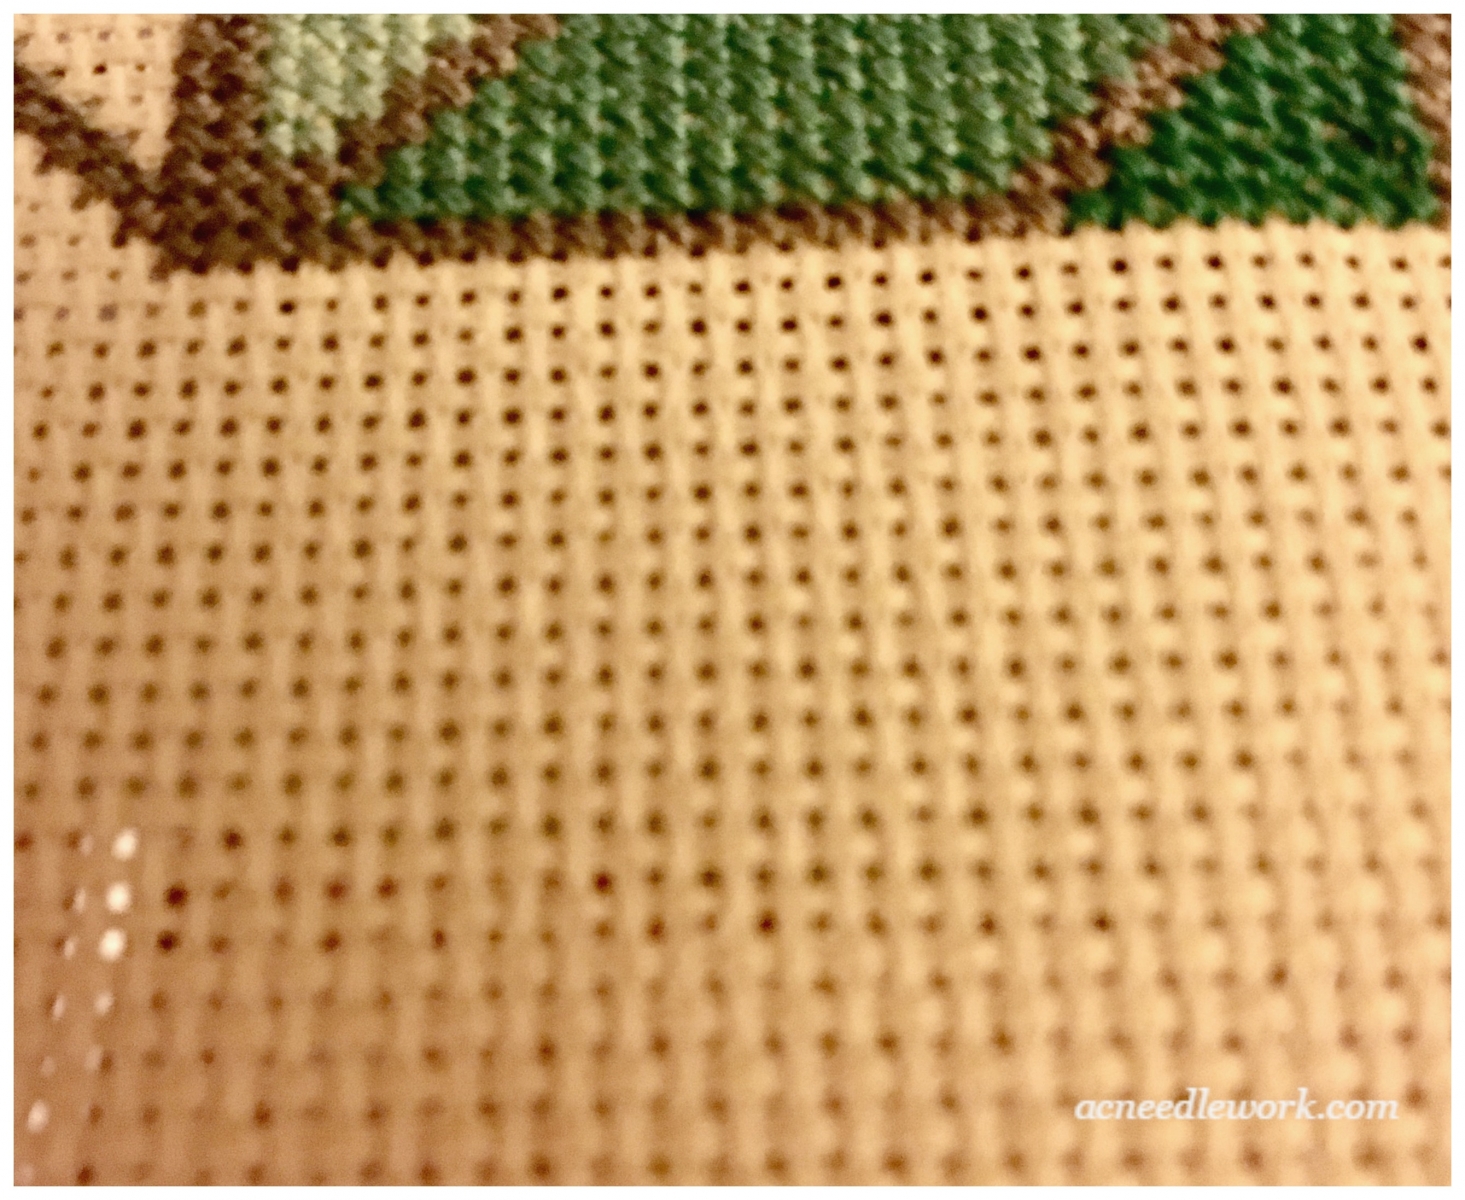
Oh, how I hate rip out stitching because I counted my stitches wrong or stitched the wrong line on the pattern. I used to use small embroidery scissors to take out the stitches until I cut my Aida fabric and had to start my project over again from scratch! Since then I have found a product by Havel’s Sewing that makes it much easier to cut and remove stitches.
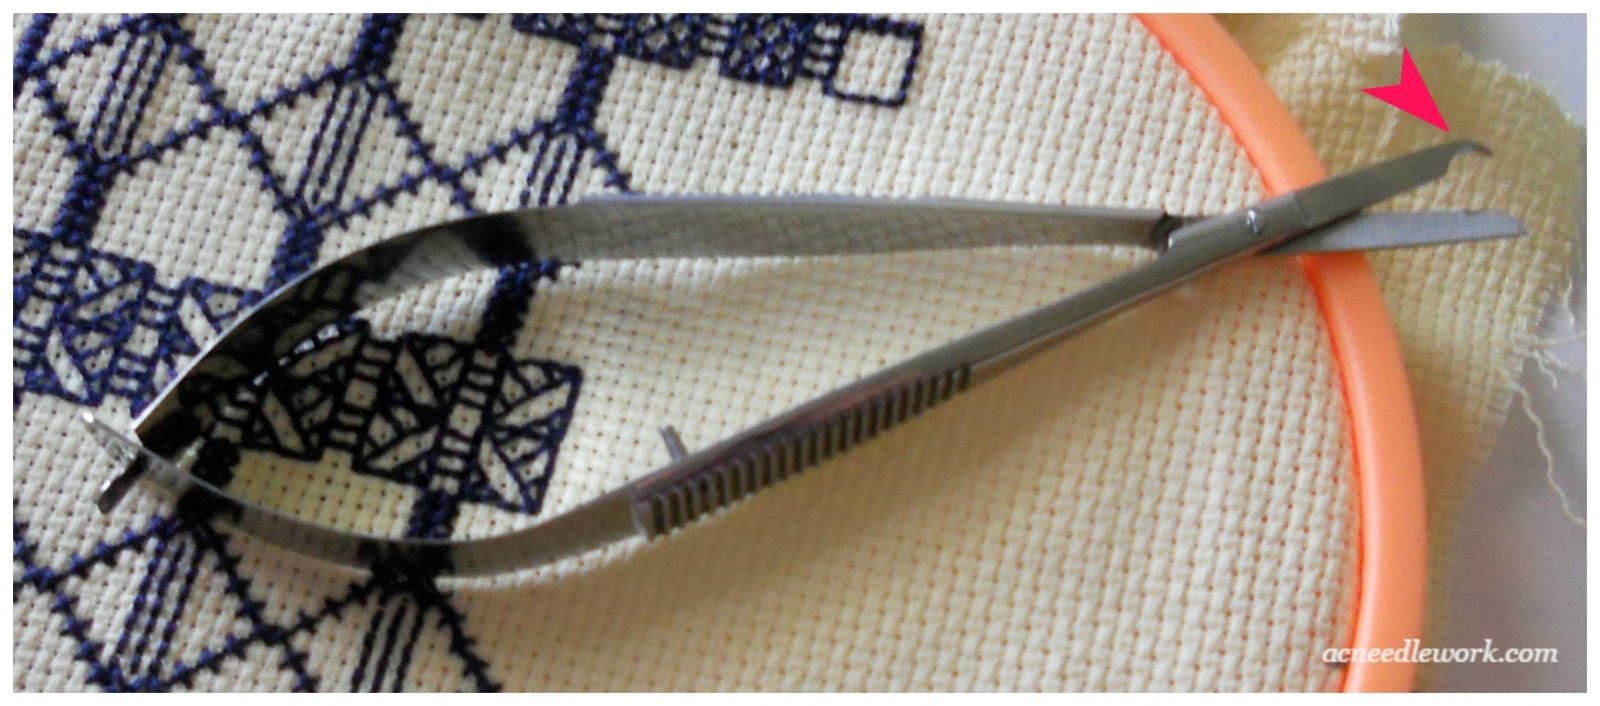
I love these “snip-a-stitch” style scissors because of the curved end on one of the blades. It allows you to get right under a single stitch and lift it up before you cut it. The odds of cutting your fabric are reduced. In fact, look closely at a section of ripping I recently did. The fabric is clean. You hardly know that stitching has been removed.
I love these little scissors so much that they are the only embroidery scissors I use now!

Ever need to look up a DMC floss number or look for a color you want to substitute in a project. I discovered this tip from cross stitch designer, Dana Batho of Peacock and Fig.
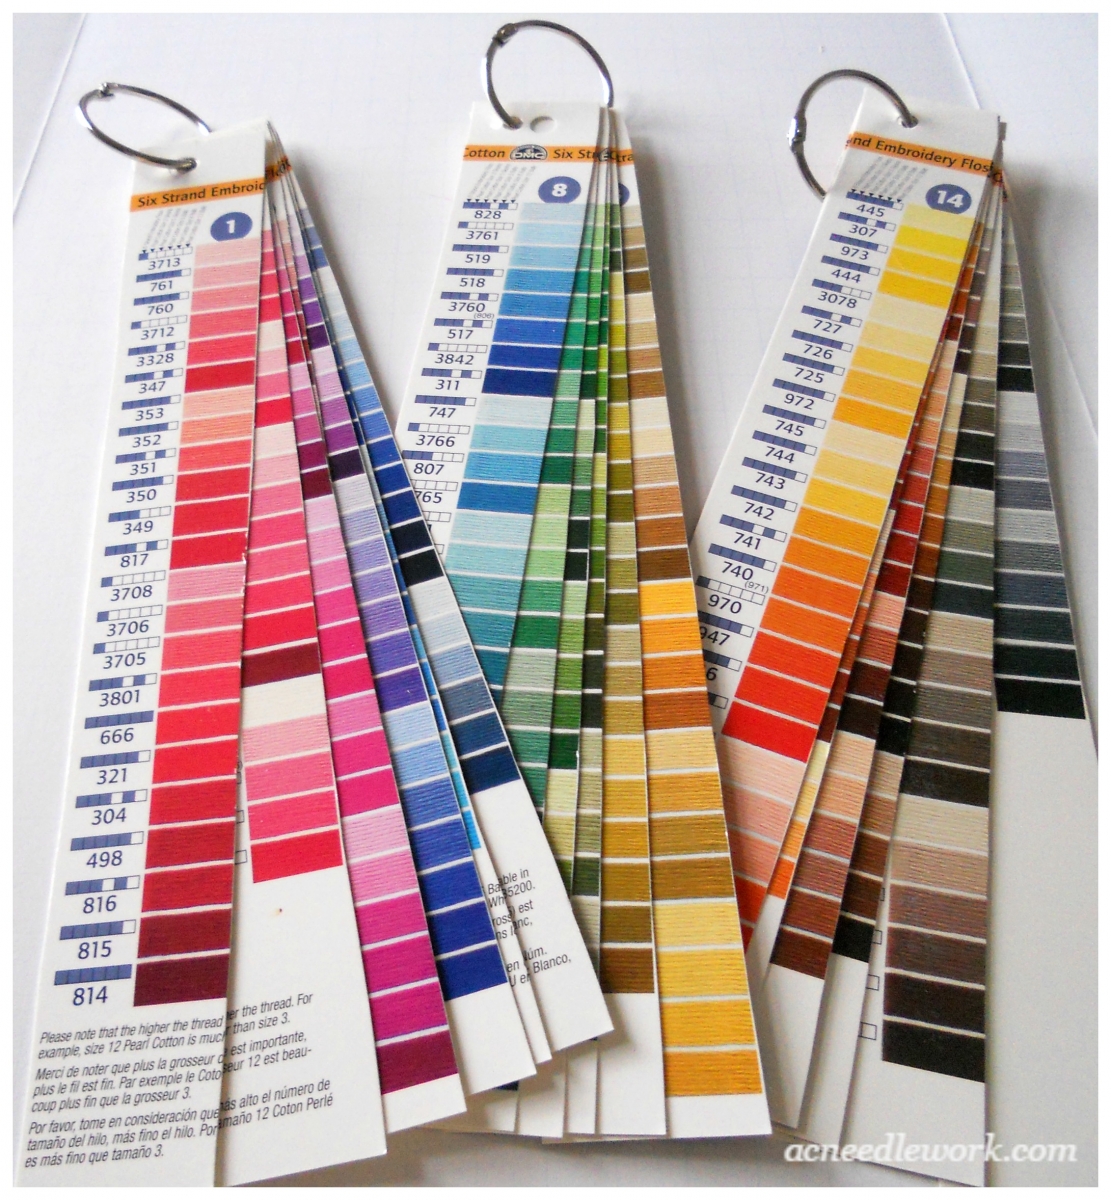
Make that DMC color chart you may have easier to use by cutting it up into strips. They end up looking like paint chip strips. Comparing shades of floss or just finding a floss number is quicker in this format. You can see the strips I made according to her instructions in this photo. Learn how to make them in Dana’s video on her Peacock and Fig blog.

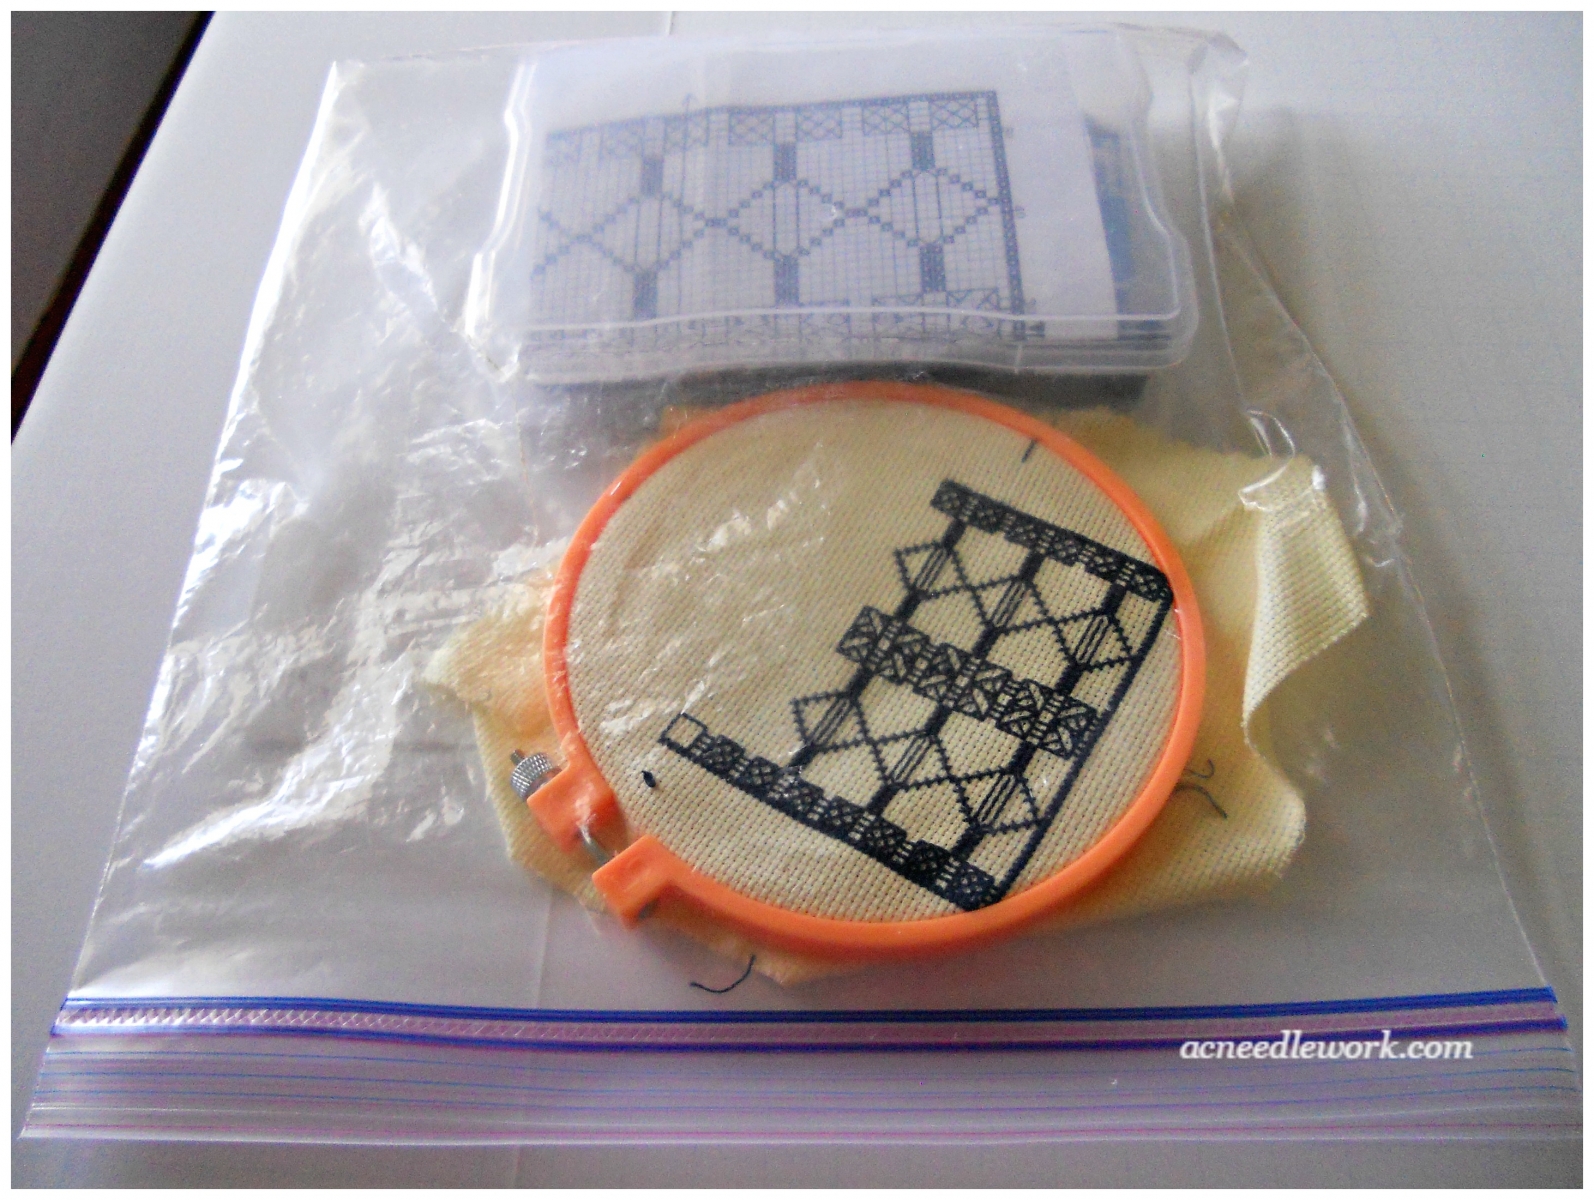
Do you take a cross stitch project with you when you are on the go? I packed up this little project the other day to work on while I spent two hours getting my car serviced. The only items you may have to buy are these 4”x 6” photo boxes.
.jpg)
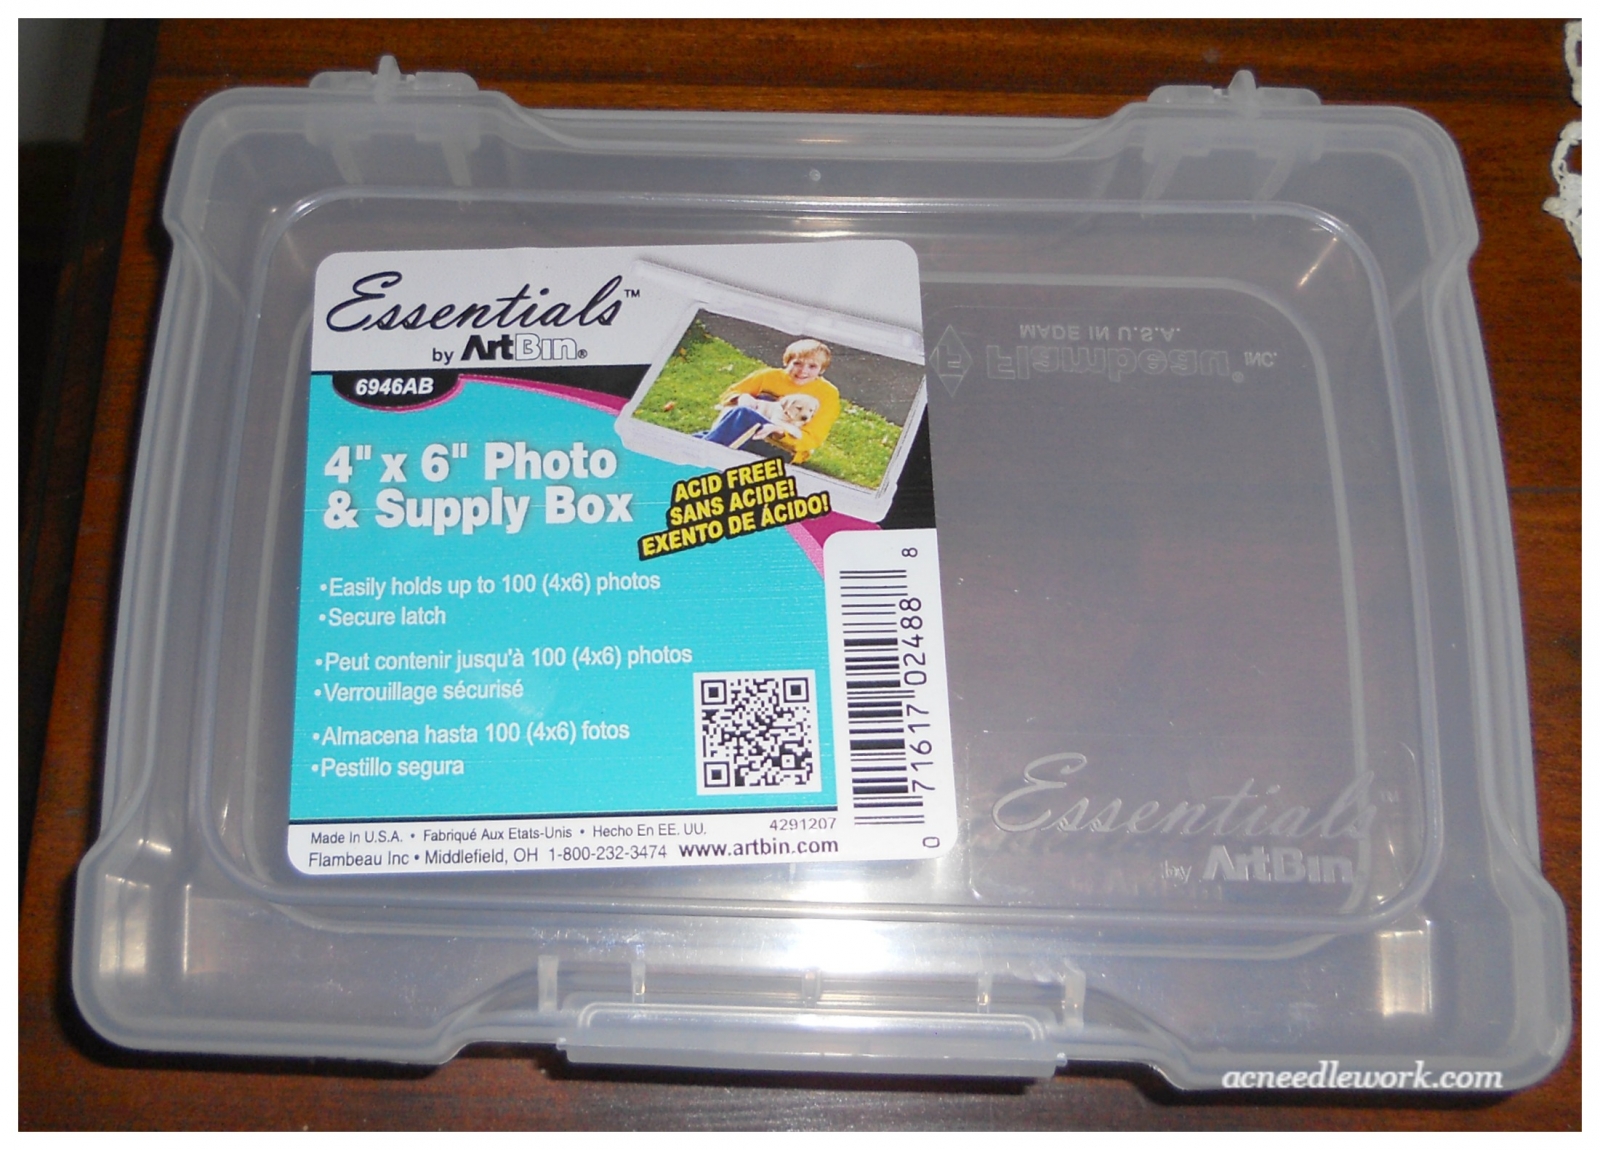
Lightweight and compact, your tools and supplies for a small stitching project fits in one perfectly. If your piece of stitching is small enough, it would fit in the box too. Since my project was too large for the box, I put it in a gallon zip lock bag, threw it in my purse and enjoyed passing the time away at my appointment. The photo boxes are available at most craft stores or on line. I found my first set at the Container Store years ago to organize my floss in. Those came in a large carrying case which makes storage great.
In Closing
Whether you need storage solutions for your cross stitch, an easier way to rip out those mistakes in your stitching, or a way to pack a project to take on the go, I hope you can use one or more of these 5 favorite needlework tips. If you try any of them, let me know how they worked for you!
Post Updated 2/18/2018
© 2017 Anne Cole. All Rights Reserved.
Related : What To Do With Those Snip-Its?
.png)

.png)
Be a part of the AC Needlework Community by following us on
Facebook (Won't you like our page?)
Won't you share this?